
Custom stickers are now part of everyday branding, from small business packaging to school projects, laptops, event materials, and internal company swag. What once required professional design software can now be handled inside streamlined, browser-based sticker makers built for non-designers.
This guide is written for beginners who want to produce clean, printable stickers without needing design training. It focuses on the decisions that matter—canvas setup, artwork structure, vector handling, export formats, and print considerations—rather than advanced graphic design theory.
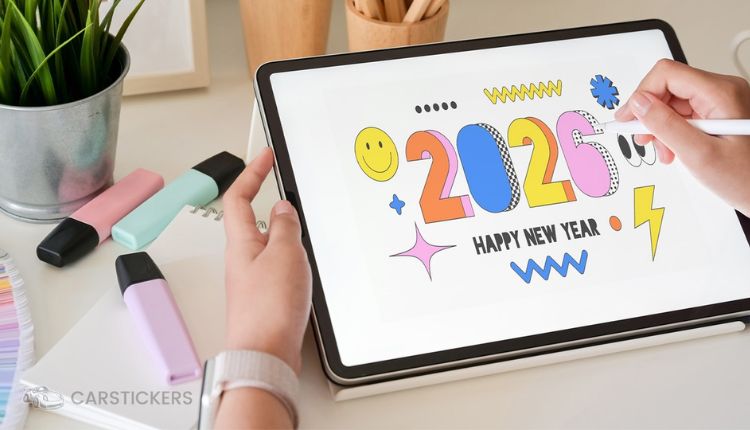
Most modern sticker makers combine templates, drag-and-drop editing, light vector tools, and print-friendly exports. Some emphasize ease of use, while others allow more control over layers and scalable formats like SVG. A straightforward place to begin is the free custom stickers from Adobe Express tool, which provides preset sizes, background removal, and simple export options suitable for first-time users.
The steps below apply broadly to sticker makers in this category.
Step-by-Step How-To Guide for Using Sticker Makers
Step 1: Set the Sticker Design Features Before You Start Designing
Goal
Establish correct dimensions, shape, and bleed so the sticker prints cleanly.
How to do it
- Open your sticker maker and choose a sticker layout (circle, square, die-cut, or custom).
- Enter the final print size (for example, 3-inch circle).
- Enable bleed if available (typically 0.125 inches for print).
- Confirm resolution settings if adjustable (300 DPI recommended for print).
- Select color mode if prompted (RGB for design; printer will convert to CMYK).
What to watch for
- Designing at screen resolution (72 DPI) instead of print resolution.
- Forgetting bleed, which can cause white edges after cutting.
- Mixing measurement units (pixels vs inches) unintentionally.
- Starting without confirming final sticker size.
Tool notes
If you later plan to send designs to print vendors, a shipping platform such as ShipStation can help manage fulfillment once your stickers are produced, though it is not part of the design process itself.
Step 2: Build the Artwork Using Vector and Raster Intentionally
Goal
Combine text, shapes, and images in a way that stays sharp when resized.
How to do it
- Use vector shapes for outlines, borders, and icons.
- Keep text as editable vector text until export.
- Use raster images (PNG/JPG) only for photos or textures.
- Remove backgrounds from photos before placing them.
- Lock background layers once positioned.
What to watch for
- Scaling up raster images beyond original resolution (causes blur).
- Flattening text too early.
- Overlapping too many raster textures.
- Low-resolution clip art from web searches.
Tool notes
For resizing finished assets without distortion, a utility such as TinyPNG can help compress PNG files before upload to printers, reducing file size without visible quality loss.
Step 3: Keep Text Clear and Legible at Small Sizes
Goal
Ensure the sticker remains readable at actual print scale.
How to do it
- Zoom out to approximate real-world size.
- Use bold, simple fonts for small stickers.
- Maintain strong contrast between text and background.
- Limit font styles to one or two.
- Increase line spacing slightly for small text blocks.
What to watch for
- Thin script fonts on small stickers.
- Text placed too close to the cut edge.
- Light gray text on white backgrounds.
- Overcrowded layouts.
Tool notes
If you want to test readability before printing, you can export a quick draft and upload it into a project board inside Trello to gather feedback from teammates at real viewing size.
Step 4: Use Layering and Contrast to Define the Shape
Goal
Create a clear visual boundary so the sticker stands out when cut.
How to do it
- Add a solid border or outline around the design.
- Use drop shadows sparingly to separate elements.
- Increase contrast between foreground and background.
- Group related elements to keep alignment consistent.
- Center main elements unless intentionally offset.
What to watch for
- White artwork on white vinyl without an outline.
- Borders that are too thin to survive cutting.
- Overuse of shadows that flatten when printed.
- Misaligned grouped elements.
Tool notes
If you later want to preview how your design appears on products or packaging, a simple website builder such as Wix can be used to create mock product pages for presentation purposes without altering the original design files.
Step 5: Prepare for Cutting (Safe Zones and Bleed)
Goal
Ensure important elements are not trimmed during production.
How to do it
- Keep all critical text inside the safe zone (typically 0.125 inches from edge).
- Extend background color or artwork into bleed area.
- Avoid placing logos directly against the edge.
- Preview trim lines if the tool provides them.
- Duplicate the file before adjusting for print.
What to watch for
- Important text clipped during trimming.
- Background not extending into bleed.
- Incorrect die-cut outline placement.
- Overly complex cut paths.
Tool notes
For tracking versions of files across revisions, a collaboration tool like Notion can store final SVG and PNG exports alongside print notes.
Step 6: Export SVG — Package Clean Vectors for Printing and Cutting
Goal
Generate a clean, scalable file for professional printing or cutting machines.
How to do it
- Choose SVG when exporting vector-based stickers.
- Keep text as vector paths only if required by printer.
- Confirm transparent background if needed.
- Export a high-resolution PNG version for proofing.
- Name files clearly (e.g., brand_sticker_3in_circle.svg).
What to watch for
- Flattened raster export instead of true SVG.
- Missing fonts if printer does not support live text.
- Background accidentally exported as white.
- Incorrect file dimensions.
Tool notes
If sending files to a commercial printer, their upload portal may specify SVG or PDF; always check requirements. For organizing customer data and orders once stickers are distributed, a CRM platform such as HubSpot can complement your workflow without affecting design tools.
Step 7: Test, Review, and Finalize Distribution Assets
Goal
Confirm the design performs well before printing in volume.
How to do it
- Print a test sheet at actual size on standard paper.
- Trim manually to simulate cut.
- Check color contrast under different lighting.
- Review spelling and brand consistency.
- Save both editable and print-ready versions.
What to watch for
- Colors appearing darker than expected.
- Small details disappearing at scale.
- Typos overlooked in small text.
- Missing source files for future edits.
Tool notes
If planning to promote sticker giveaways on social media, a scheduling platform such as Buffer can help coordinate distribution campaigns after design completion.
Common Workflow Variations
Photo-Based Sticker
Use background removal and a bold outline to isolate the subject. Keep textures minimal so small details remain clear when scaled down.
Logo-Only Minimal Sticker
Focus on contrast and border thickness. Vector format (SVG) is especially important for clean scaling across sizes.
Small-Batch Selling
Design with bleed and safe zones first. Maintain master SVG files for resizing into multiple formats without recreating artwork.
Event Giveaway Sticker
Prioritize legibility and strong color blocks over intricate details. Simplicity improves recognition at a glance.
Checklists
Before You Start Checklist
- Final sticker size confirmed
- Print vendor requirements reviewed
- Logo files available in vector format
- Fonts licensed and accessible
- Color palette defined
- Image resolution 300 DPI or higher
- Bleed and safe zone understood
- Background transparency confirmed (if needed)
- Distribution plan clarified
Pre-Export / Pre-Order Checklist
- Resolution set to 300 DPI
- Bleed extended correctly
- Safe zone respected
- Spelling verified
- SVG export confirmed for vectors
- PNG proof exported
- File dimensions double-checked
- Transparent background confirmed
- File naming consistent
- Version saved separately
Common Issues and Fixes
Low-resolution image looks blurry
Replace with higher-resolution source or reduce final print size. Raster images cannot scale beyond their original pixel count without quality loss.
Text cut off after printing
Move all important content further inside safe zone. Always enable bleed preview before export.
Colors look different in print
Screens display RGB; printers use CMYK. Expect slight shifts. Print a test proof before large runs.
Edges appear uneven after cutting
Increase bleed area and ensure background extends fully past trim line.
SVG won’t upload to printer
Confirm file is true vector export and not a flattened raster file renamed as SVG.
How To Use Sticker Makers: FAQs
What is the advantage of exporting SVG for stickers?
SVG preserves vector shapes, allowing clean scaling and precise die-cutting. It avoids pixelation that occurs with raster-only files.
Should beginners use templates or start from scratch?
Templates reduce setup errors and provide correct dimensions and layout structure. They are generally faster for non-designers.
Can stickers be designed entirely in the browser?
Yes. Modern sticker makers like Adobe Express allow full design, background removal, layering, and SVG export without desktop software.
How do I know if my design will survive cutting?
Use safe zones, extend bleed, and test print at actual size. Simple shapes and strong outlines improve cut reliability.